The fact that Microsoft Teams now allows us to quickly and easily create webinars is fantastic. With a few clicks, you can create your webinar, add speakers and customise a registration page to share with potential attendees.
One area I have had a few challenges with is further automation and sharing the registration with a wider group of people, for example, a marketing team that are all working on the event together.
By default, only the organiser is able to see the attendee report if enabled and for me, this created a few challenges.
If you are using Microsoft Dynamics as your CRM there are some fantastic integrations that would allow you to build more effective workflows quickly and easily but if you aren’t, out of the box you are left with little option.
That was until I did a little bit of digging into how the registrations work for Teams Webinars, following the article below I learnt that registrations and attendees are in fact managed my a Microsoft List stored under the organiser’s personal lists.
https://support.microsoft.com/en-us/office/schedule-a-webinar-0719a9bd-07a0-47fd-8415-6c576860f36a
With a little bit of help from the fabulous Christopher Hoard I was able to find the lists relating to the webinar I had created.
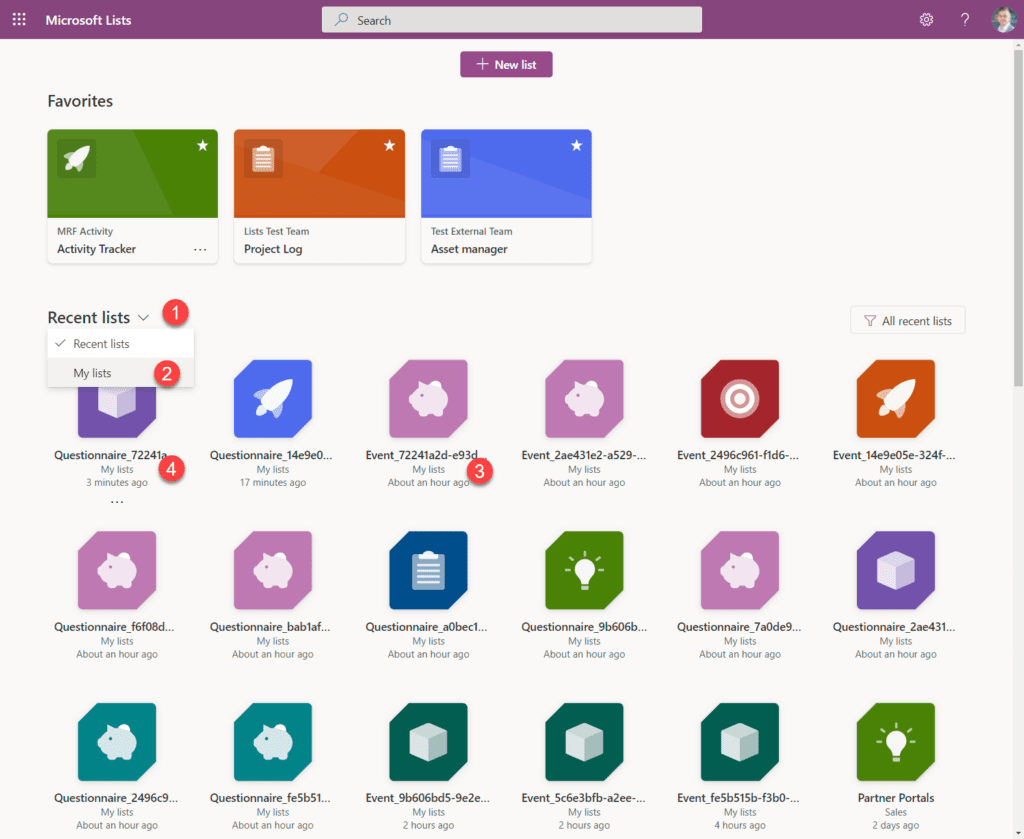
To do this you will need to visit Microsoft Lists from the Office waffle, once in Lists select the My Lists option (2) from the recent lists (1) drop-down.
From here amongst any other lists, you may have created you will see lists name Event (3), Questionnaire (4) and Presenter followed by a unique ID. These lists relate to your Microsoft Teams Webinars, the Event list contains the metadata for the event such as the date, registration link etc, etc, the Questionnaire list contains the registration information and the presenter list does what it says on the tin and contains the information about the presenters for the event.

To find which of these relates to the webinar that you wish to view/edit or create an automation workflow for I would recommend looking at the event lists firsts to review which is the one that is relevant to your webinar in question.
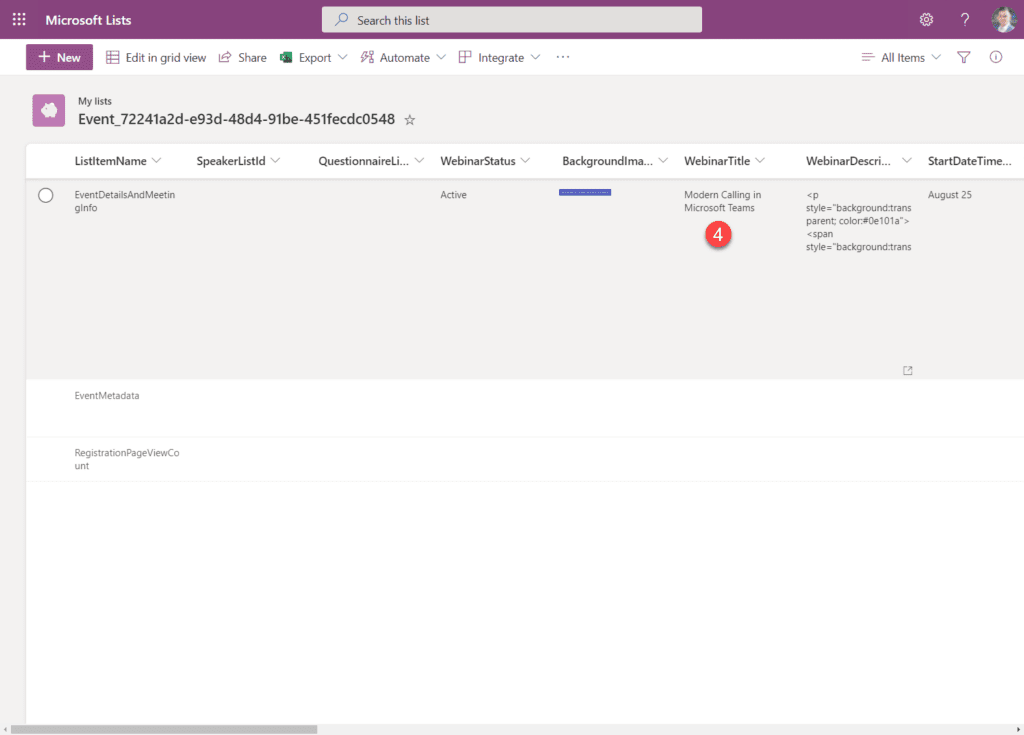
Inside the event list, you can easily see the title of the webinar (4), once you have this you can easily figure out the name of the relevant attendee’s (Questionnaire) list by looking at the unique ID after the event.

When inside the attendee’s list you can see all the relevant information about the attendees, from here I have been able to edit attendee information as well as delete attendees without issue, but please go careful as I am unsure of how supported this is.
Now I knew which list the attendee information was stored in I was able to create my relevant automation using Power Automate.
The only thing to keep in mind is that when in Power Automate it will not find these lists automatically, I had to paste the address of the list into the trigger for it to be found.
I have now got several fully automated workflows when an attendee registers for my Teams Webinar. Fingers crossed in the future this could be a bit more user friendly, maybe even add a create automation with PowerAutomate button at the top of the webinar!


Leave a Reply